-
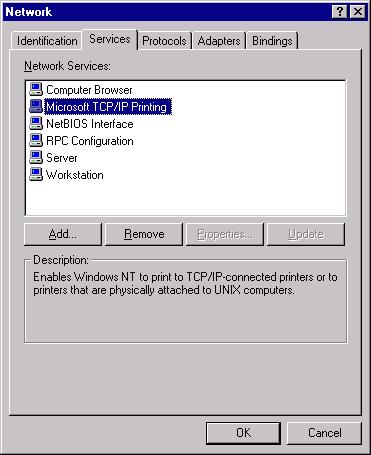
Open the Network Control Panel and
confirm Microsoft TCP/IP Printing service is installed under the Services
tab. If the service is not installed, click here
for further instructions.
-
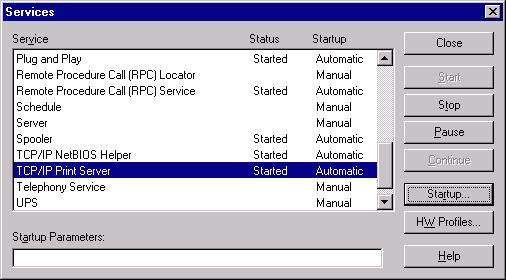
Open the Services Control Panel and
set the TCP/IP Print Server to automatically start.
-
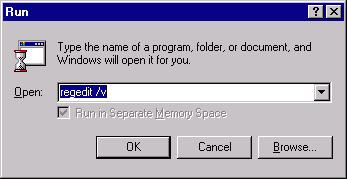
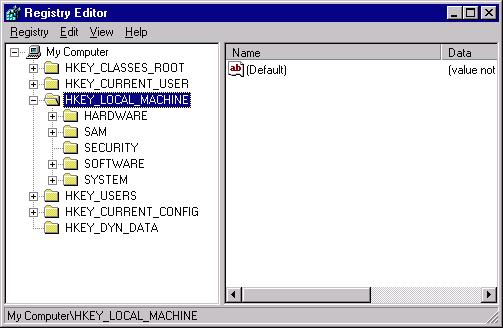
Go to the Start, Run, and type: regedit /v.
Click OK. This will open the Registry Editor.
-
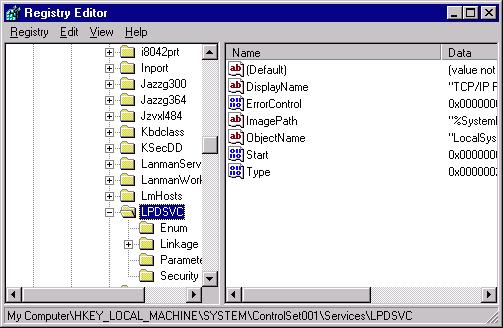
Open HKEY_LOCAL_MACHINE.
-
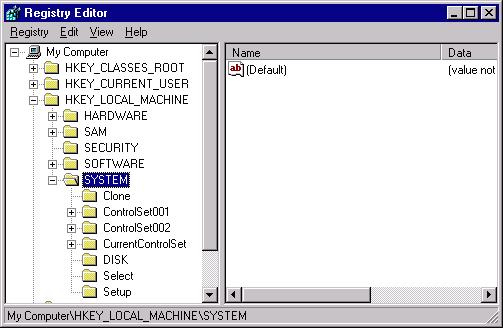
Open SYSTEM.
-
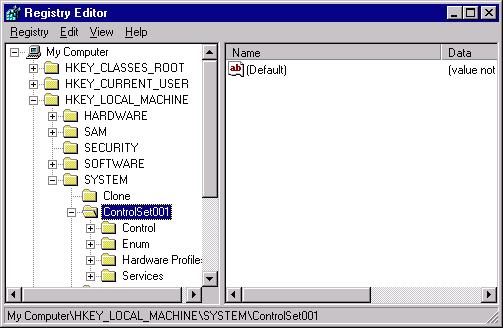
Open ControlSet001.
-
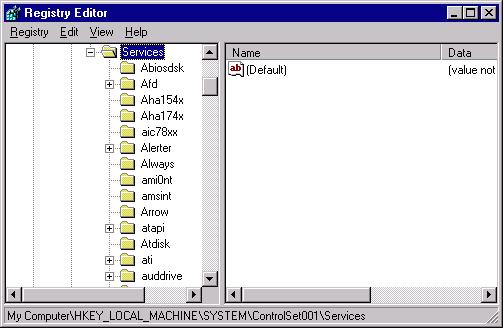
Open Services.
-
Open LPDSVC.
-
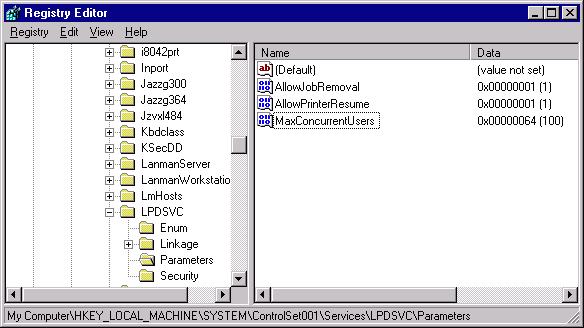
Click on Parameters.
-
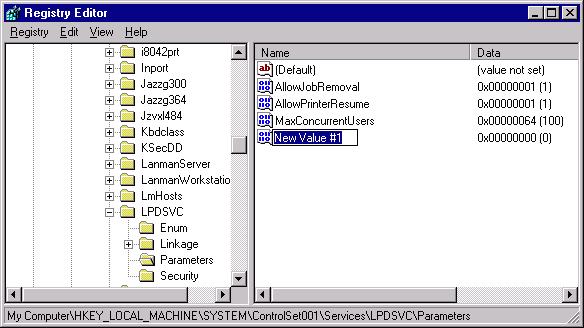
On the Menu, click Edit, New, DWORD
Value.
-
Name value SimulatePassThrough.

-
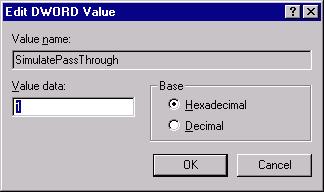
On the Menu, click Edit, Modify.
Change the Value Data to 1. Click OK. Exit Registry Editor.
-
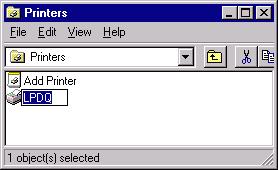
Open the Printers Control Panel and
select the printer for LPD printing.

-
On the Menu, click File, Rename and name
the printer LPDQ.
- On the Menu, click File and make certain Set As Default is checked.
-
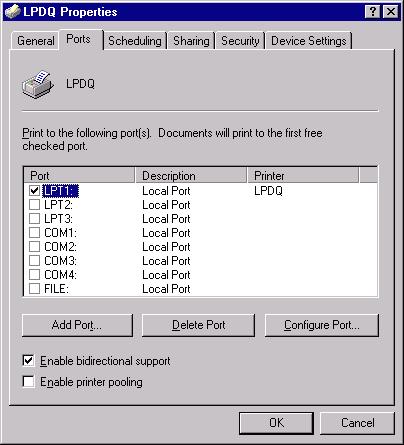
On the Menu, click File, Properties and
confirm that the LPDQ printer is selected to the LPT1 port. The printer
must actually be connected to the LPT1 on the machine (look if you are
unsure).
-
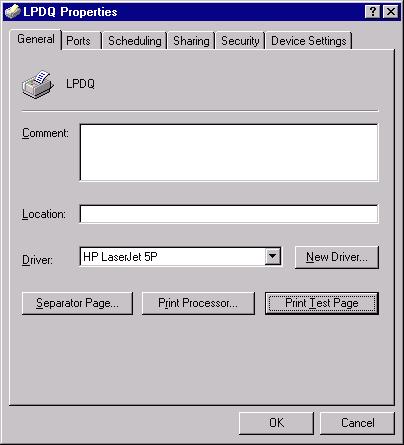
Click on the Print Test Page button
and confirm the printer is printing properly.
-
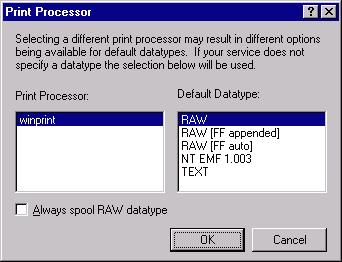
Click on the Print Processor button and confirm
the data type is set to RAW. Click on all "OK's" necessary to exit
LPDQ Properties.
- Test LPD printing. End of instructions.
Back to Top
Back to Top
Instructions for adding TCP/IP Printing Services for the Network Control Panel
-
Insert the Windows NT installation disk
into the CD-ROM. Click on the Add button of the Network Properties
window.
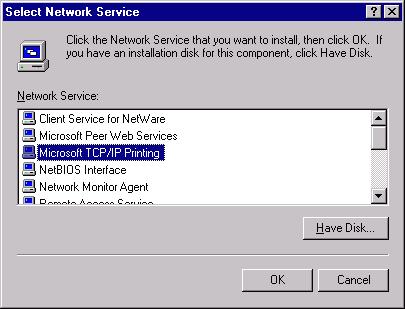
-
Select Microsoft TCP/IP Printing
and click OK. Follow any additional instructions and allow machine
to Restart. Follow the instructions for LPD Machine Setup for Windows
NT above.
Back to Top
Additional Information
LPD Printing to a Shared Printer.
The machine that is physically attached to the printer must be setup as above. The machine using the shared printer must have the shared LPDQ printer set as the default printer.Trouble shooting
Scott Parish thinks setting the SimulatePassThrough data value to 0 might work if the machines are receiving the data into the print queue but not printing.Kevin Morrell thinks the following printers will not work at all with lpd printing.
Those printers include GDI printers and the following HP printers:
HP DeskJet 710C printer
HP DeskJet 720 printer
HP DeskJet 722 printer
HP DeskJet 820C series printer
HP DeskJet 1000C printer
HP DeskJet 1000Cxi
HP DeskJet 1000Cse
HP LaserJet 3100 product
HP PhotoSmart Photo Printer